Template links let you create a reusable URL that anyone can click to fill out and sign your form—no need to send it manually each time. They’re perfect for waivers, intake forms, or any document you need multiple people to complete independently.
The main difference between a Template Link and a Standard Template is that a Template Link is meant for a single recipient per submission, but can be reused by many individuals independently. It’s designed for ease of use and bulk intake. To create a Template Link, follow the instructions below:
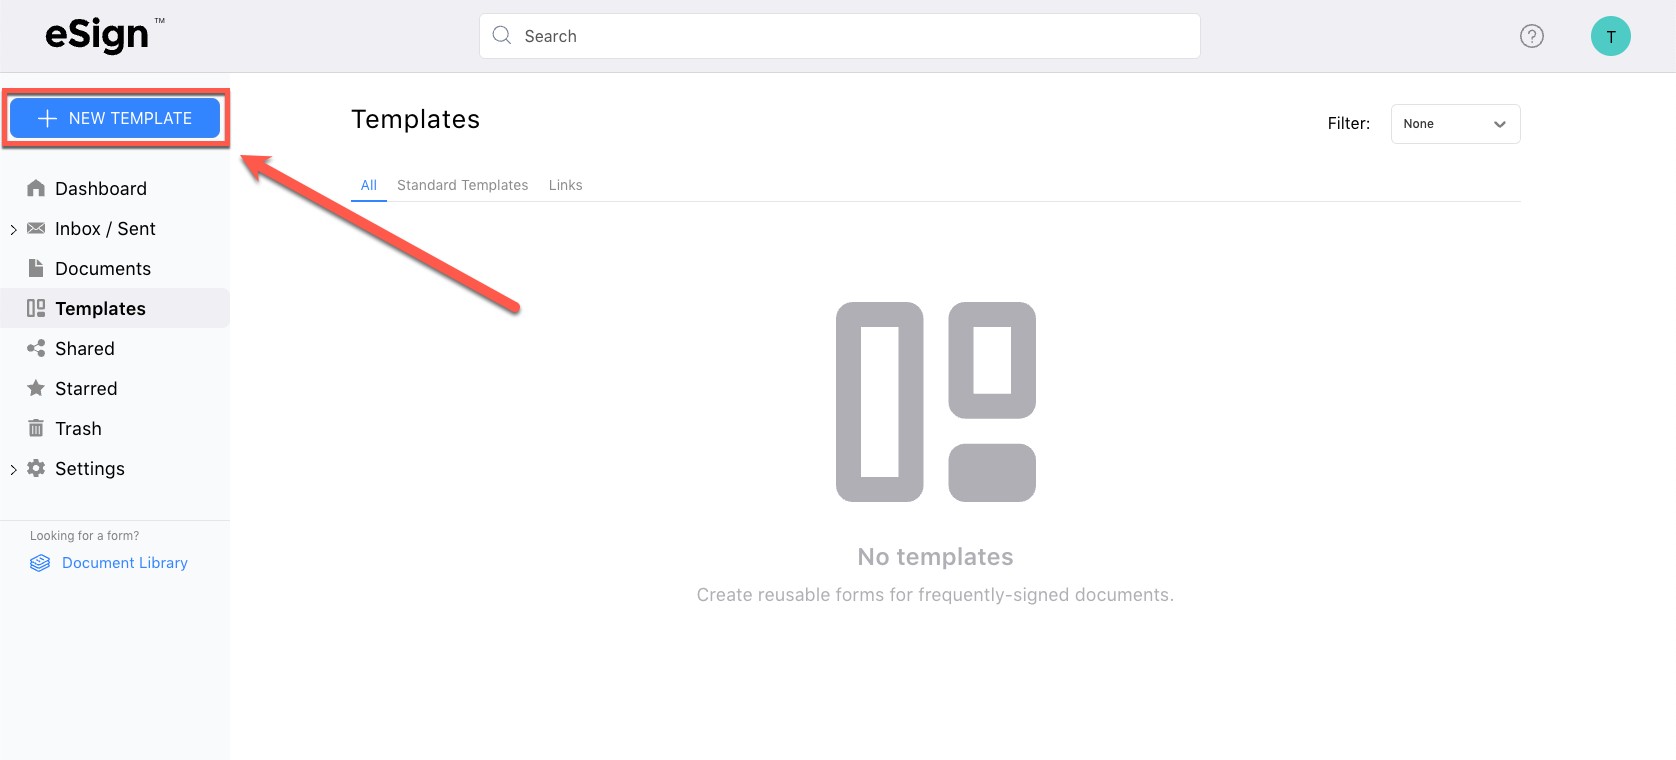
Step 1 – Navigate to the “Templates” Tab
You’ll need a free (or paid) eSign account to create a template. For instructions on signing up, see our article “How to Create a Free eSign Account.”
After logging in, look to the left sidebar and click the “Templates” tab.

Step 2 – Click “New Template”
Click the blue “+ New Template” button in the top-left.
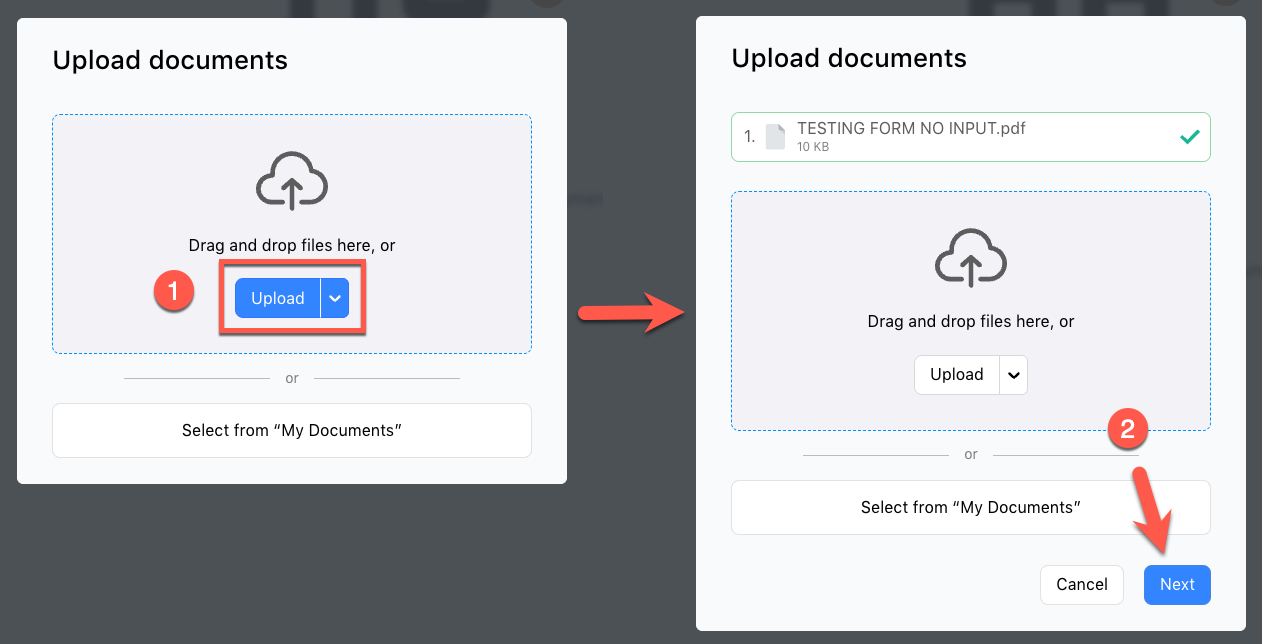
Step 3 – Upload File(s)
Click the blue “Upload” button OR drag file(s) from your computer into the grey area. Some of the popular file types accepted include PDF (.pdf), Microsoft Word (.docx), Rich Text Format (.rtf), Text Files (.txt), Image Files (.png and .jpg), and Spreadsheet Files (.xlsx and .csv).
Click the blue “Next” button once all file(s) have been uploaded.
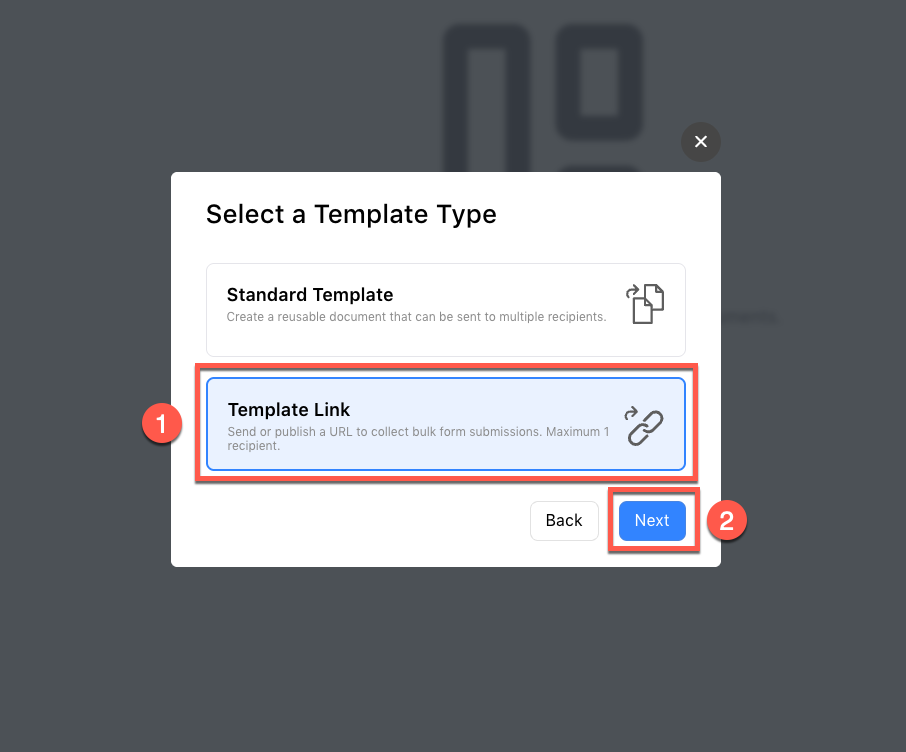
Step 4 – Select “Template Link”
From the two (2) options displayed, select “Template Link” and click the blue “Next” button.
Step 5 – Enter the Role Name
The role is the individual who will be inputting information into the form. The name of the role is for reference only and can be anything.
For example, if the form was a safety release form for a climbing gym, the role could be “Customer” or “Climber.”
After entering a role, click the blue “Next” button.

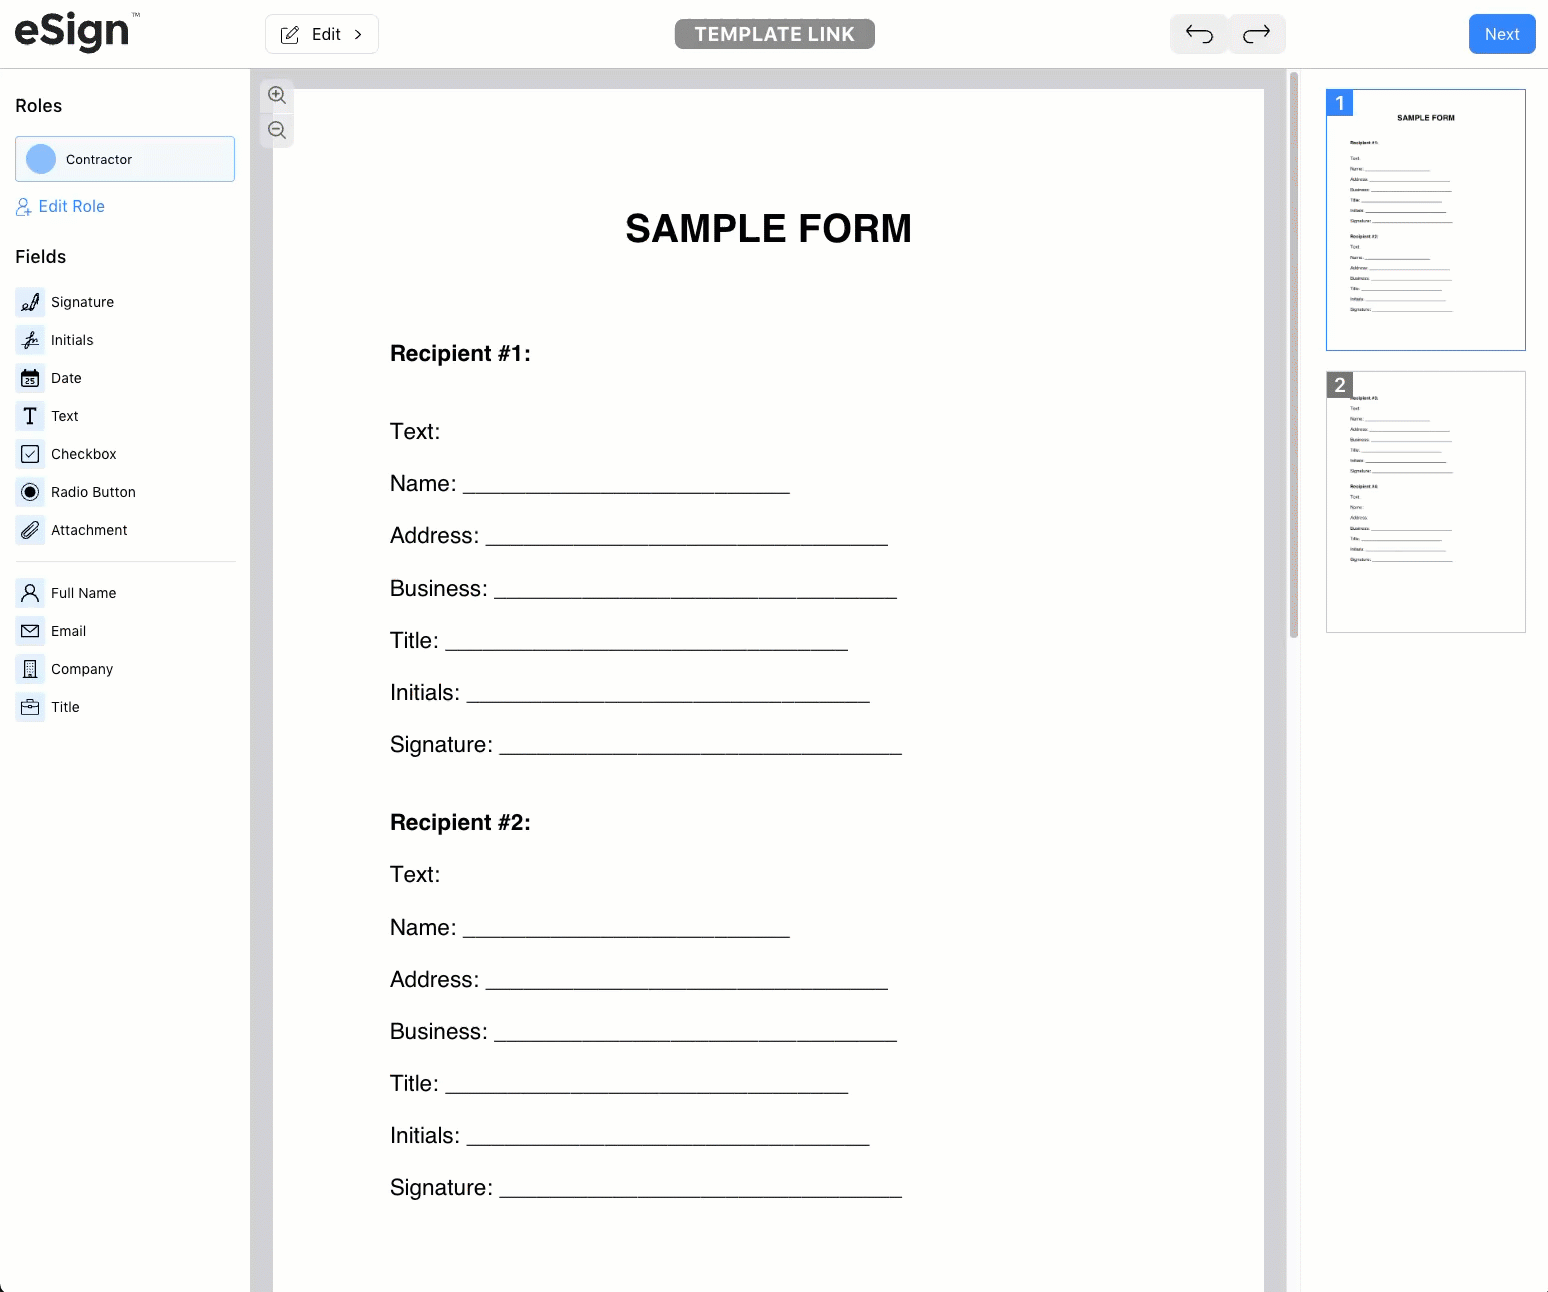
Step 6 – Place Fields
Fields are on the left side of the page. Click a field, hover over the desired location, and click again to place the field.
To make a field optional, select it and toggle off the ‘Required Field’ setting on the right side of the page. You can also resize fields by clicking and dragging their corners or edges.
Click the blue “Next” button once you’re satisfied with field placement.
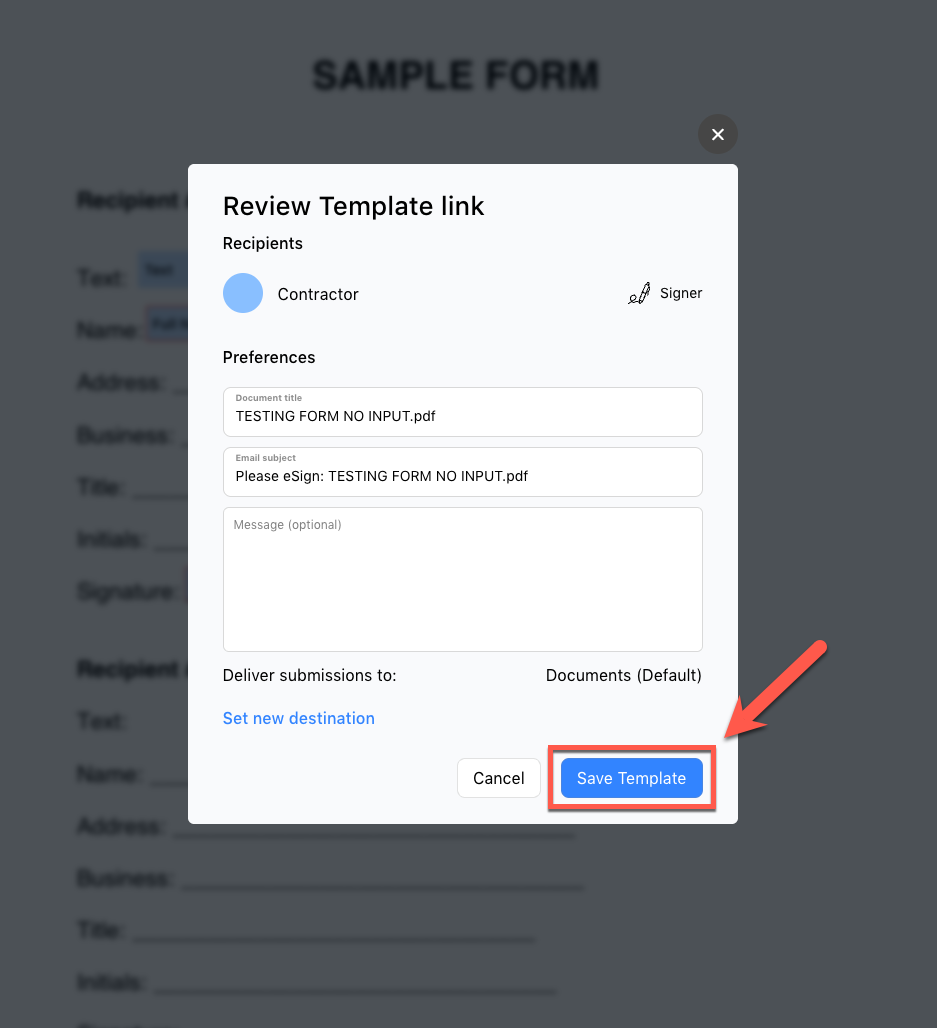
Step 7 – Review and Save
A pop-up will appear providing an overview of the template link. Here you can edit the document’s title and the email subject, include a custom email message, and change where submissions are saved in your dashboard.
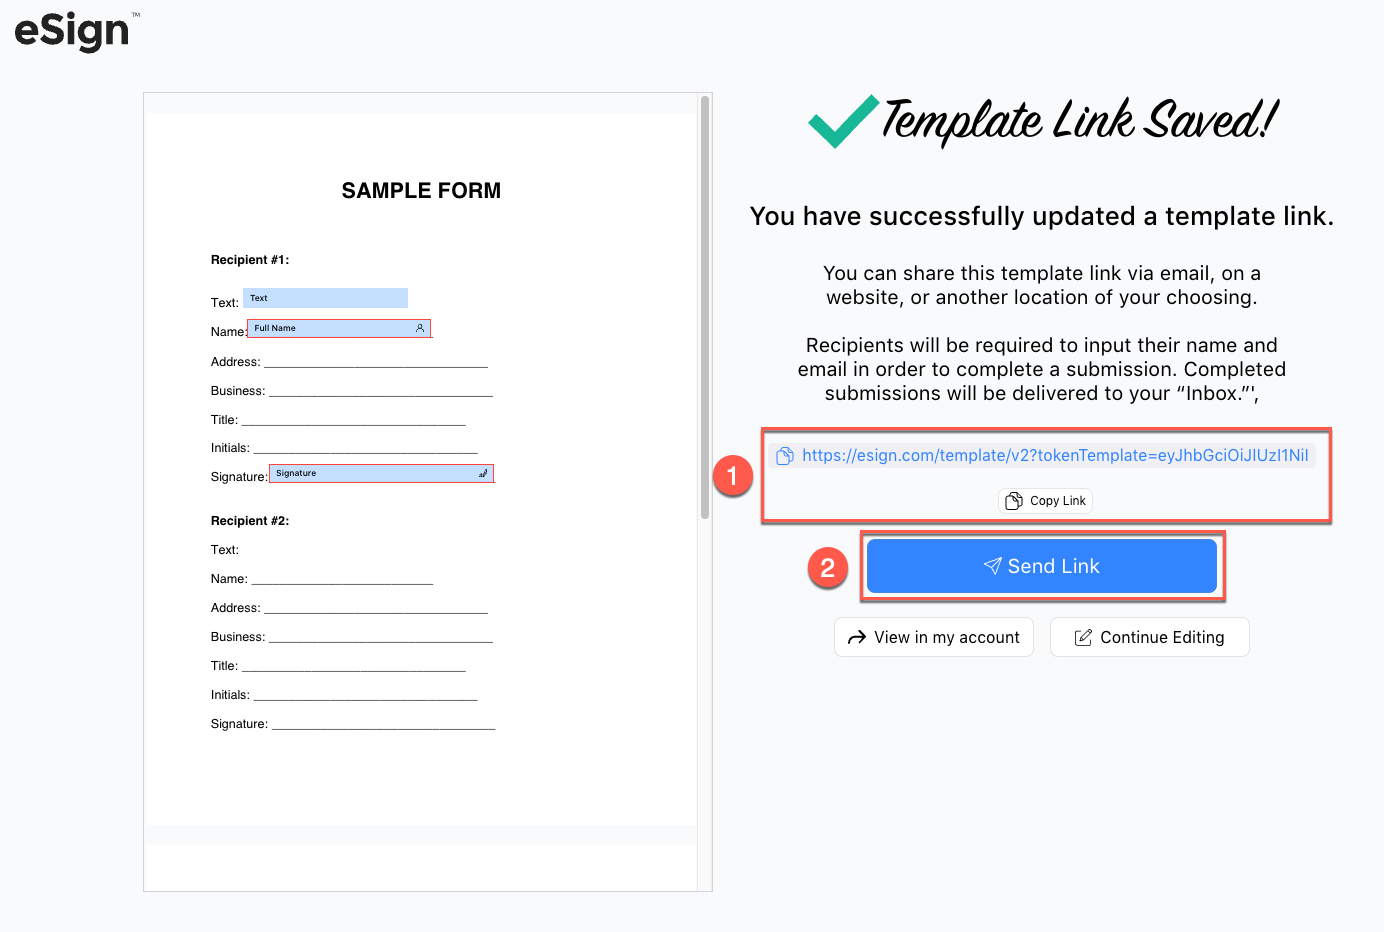
If everything looks good, click the blue “Save Template” button. Your template link is now ready for use.
Step 8 – Using the Template Link
There are two (2) methods of using the template link.
- Click “Copy Link” and share it with anyone you need to collect the form from. You can send the link in a message, add it to your website, include it in an email signature, turn it into a QR code, place it on an invoice, and more.
- Click “Send Link” and specify the name and email of the intended recipient. This is useful for one-off deliveries and/or when you want to control who can complete the form.
Submissions will appear in your “Sent” and “Documents” tabs, or a folder if specified by clicking the “Set new destination” button in Step 7.