In this article we’ll walk you through sending a sign request. This requires you to have an eSign account. For assistance in signing up, check out our article How to Create a Free eSign Account.
Step 1 – Click “Start”
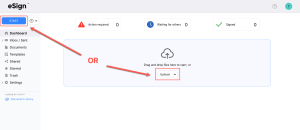
In the Dashboard tab, there are two (2) ways of starting a sign request:
- Click the blue “START” button in the top-left.
- Click the white “Upload” button in the center of the screen.
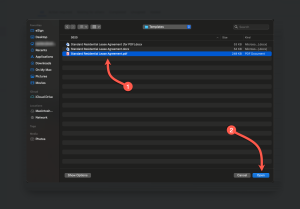
Step 2 – Select a File
Select a file from your computer or mobile device. We recommend PDF files but also support Word (.docx), Text (.txt), RTF, PNG, JPEG, and other image formats.
Step 3 – Click “Next”
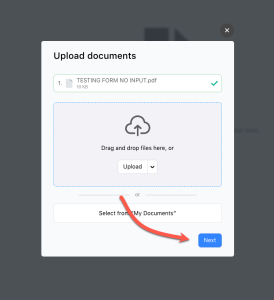
A green checkmark will appear when the document has completed uploading. If you need to add another file to the sign request, click the white “Upload” button and select another file.
If you have already uploaded a file to your account and you wish to add it to the sign request, click the white “Select from My Documents” button.
Once you have uploaded the desired file(s), click the blue “Next” button.
Step 4 – Select “Sign”
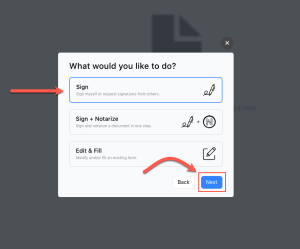
Select the “Sign” option and click the blue “Next” button.
Selecting “Sign + Notarize” adds another level of certification to the sign request and is only required for certain documents. For help with signing + notarizing a form, see our help article “How to Sign + Notarize” a document.
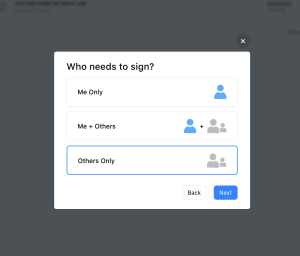
Step 5 – Choose who’s signing
If you (the sender) will be signing the document in addition to one (1) or more recipients, choose “Me + Others.” If you are only requesting others to sign, select “Others only.”
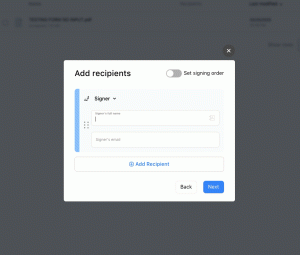
Step 6 – Add recipients
Enter the full name and email of each signer. To add additional signers, click the “Add Recipient” button.
Toggle the “Set signing order” button to set the order in which recipients sign the document. This is useful if a recipient needs to view what a previous recipient inputted.
To include a “CC” recipient, click the “Signer” dropdown. A CC recipient can view the status of the sign request but is unable to make any edits.
Once all recipients have been added, click the blue “Next” button.
Step 7 – Assign fields
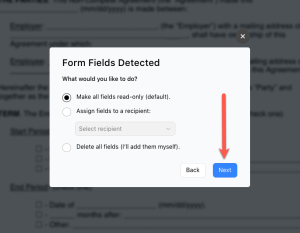
If the form you uploaded contains detectable fields, a pop-up will appear asking you how eSign should treat these fields.
There are three (3) options:
- Make all fields read-only (default): This converts any text previously entered into the document as a part of the document itself. If you uploaded a form with information already inputted, choose this option.
- Assign fields to a recipient: If one (1) recipient will predominantly complete all fields on the form, select this option and choose the recipient in the provided dropdown menu.
- Delete all fields: This gives you a blank slate. All fields, whether or not they contain information, will be deleted from the form, giving you full control over the document itself.
After selecting an option, click the blue “Next” button.
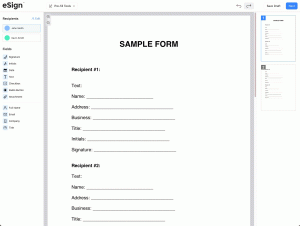
Step 8 – Place fields
There are eleven (11) fields to choose from. Begin by selecting the desired recipient on the upper-left side of the screen. Then, click on a field, hover over the space you’d like it to go, and click again to place it. Drag the corners of the field to adjust it to the appropriate size.
All placed fields are required by default. If a field is required, the recipient cannot complete the sign requests until the requested information has been inputted. This applies to all fields – not just signatures. To make a field optional, click the field and toggle the “Required Field” button at the right-side of the screen.
Step 9 – Review & Send
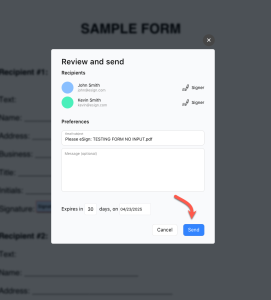
eSign automatically creates an email subject. This can be customized if desired. You can also include a custom message to all recipients that appears in the sign request email.
Sign requests automatically become voided after thirty (30) days. This can be shortened or extended by entering a different expiration date.
If everything looks good, click the blue “Send” button to officially send the sign request.
Step 10 – Wait for Recipients to Sign
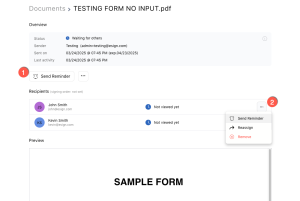
After the sign request has been sent, you can view the status of the document by clicking it in the “Documents” tab. You have several options:
- Click Send Reminder to deliver an email notification to all recipients. This is useful if more than a day has passed and multiple recipients have not signed.
- Click the settings button (…) next to a recipient to display options specific to that signer. “Send Reminder” sends a reminder to that recipient only. “Reassign” allows you to assign the recipient to a different email address. “Remove” gives you the option of deleting that recipient from the sign request while still allowing other recipients to sign.

