In this article we’ll walk you through the steps of sending a sign request without an account. To send a sign request with an account (logged in), view our help article How to Send a Sign Request.
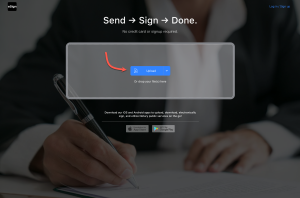
Step 1 – Click “Upload” on the Homepage
Go to eSign.com. Click the blue “Upload” button.
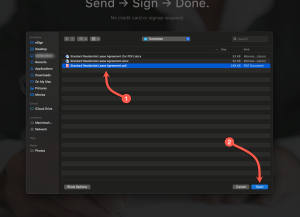
Step 2 – Upload a Document
Select a file from your computer or mobile device. We support PDF, Word (.docx), Text (.txt), RTF, PNG, JPEG, and other image formats.
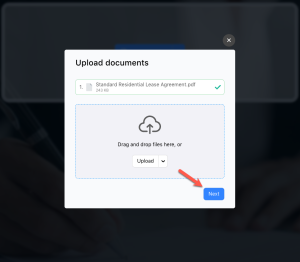
Step 3 – Click “Next”
If you need to combine multiple files into one sign request, click the white “Upload” button and repeat Step 2. Otherwise, click the blue “Next” button.
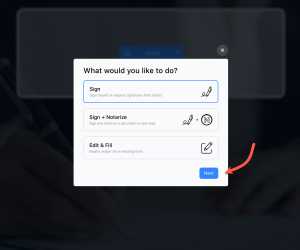
Step 4 – Select “Sign”
If your document only requires signatures, select “Sign” and click the blue “Next” button.
If your document requires the signatures to be notarized, click “Sign + Notarize” followed by the blue “Next” button.
Note: this guide is for signing only. See the How to Notarize page for assistance with signing and notarizing a document.
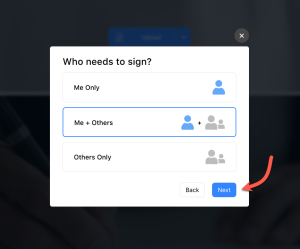
Step 5 – Who needs to sign?
This screen asks who is signing the document. If you’re the only signer, select “Me Only.”
If you AND one (1) or more people will be signing, select “Me + Others.”
Finally, if you will NOT be signing but will be requesting signatures from one (1) or more people, click “Others Only.”
Once you’ve made your selection, click the blue “Next” button.
Note: This guide is for requesting signatures from others. If you intend to self-sign the document, see our guide “How to Sign a Document using eSign.“
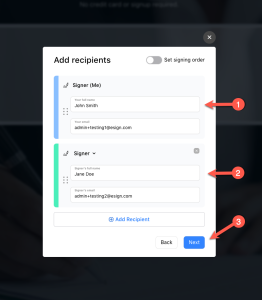
Step 6 – Add recipients
Assuming you selected “Me + Others” in the previous step, you will need to enter the Full Name and Email Address of yourself and each recipient.
If you intend to include a “CC” recipient (someone who can view the document but does not sign or input information), hover over the “Signer” dropdown and select “CC.”
Select “Set signing order” to establish an order for recipients. If turned “On,” each recipient will only receive a sign request after the previous recipient has completed signing.
After entering the name and email of each recipient (including yourself), select the blue “Next” button.
Step 7 – Assigning Form Fields
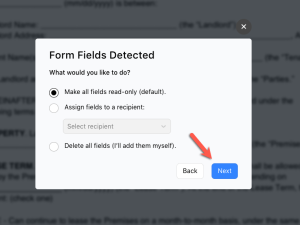
If the file(s) you uploaded contains fillable fields, we will ask you to choose from one of three options:
- Make all fields read-only (default). This removes the fillable fields and makes any pre-inputted text part of the document. This is the best option if you filled out the form beforehand and only need to collect signatures and/or a few pieces of information.
- Assign the fields to a recipient. If selected, all fillable fields on the document will be assigned to one recipient (this recipient can also be yourself). This is useful if one (1) person will mostly fill out the form.
- Delete all fields. This makes the document a blank slate, allowing you to add your own fields. Any pre-existing fields on the form will be permanently deleted.
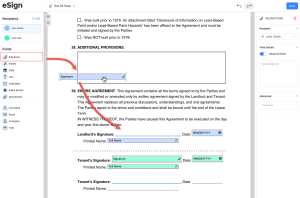
Step 8 – Place Fields
Select a recipient on the left side of the screen. Then, click on a signature field and place it in the location you want you (or the recipient) to sign. Repeat this for other recipients and/or other field types. When you’re done placing fields, click the “Next” button in the top-right corner.
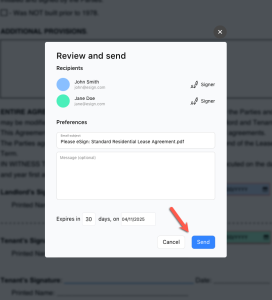
Step 9 – Review & Send
Go through all recipients to confirm the correct names and email addresses have been entered.
If desired, you can alter the email subject or input a custom message that appears in the email.
The default expiration date for a sign request is 30 days. You can alter this by entering a new expiration date or directly changing the number of days until expiration. If everything checks out, click the blue “Send” button.
Step 10 – Wait for Recipients to Sign
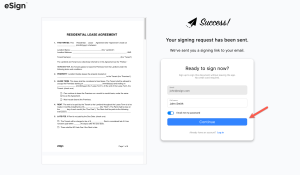
An email will be sent to each recipient containing a link to sign the document. Once all parties have completed signing, you will receive an email containing the completed and finalized document. We recommend signing up for a free account using the same email used to send the sign request. A free account allows you to:
- View who has signed
- Send signing reminders
- Save your signature for future use
- Send 3 free sign requests (resets monthly)
- Save contacts
- Create templates
- Sync documents with Google Drive, Dropbox, and other providers
- And much more

